3D Printer Review: XYZprinting’s da Vinci 1.0 Pro 3-in-1 Offers Solid Performance in 3D Printing & Laser Engraving, Lackluster 3D Scanning

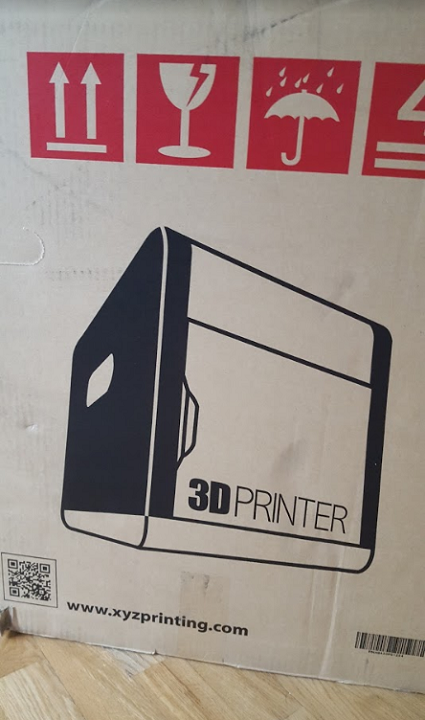 A few months ago, I received a long-anticipated package in the mail: the first desktop 3D printer to land on my doorstep. While we cover 3D printing day in and day out here, and I’ve had the privilege of both watching and using several 3D printers around the world, I have a somewhat embarrassing confession: I don’t own one myself. (…Yet.) So when this package arrived on a bright summer day, I was thrilled: my review unit from XYZprinting had arrived. I had some time to test out the da Vinci 1.0 Pro 3-in-1 unit, introduced and made available earlier this year.
XYZprinting, as you may have noticed, has held a prestigious position in the market for some time now, holding steady as the market leader in desktop 3D printing. 3D technologies from the company encompass a variety of desktop 3D printers (some, like the unit I tested, incorporating 3D scanners and/or laser engravers), 3D printing pens, and handheld 3D scanners — with more products coming to market all the time, as it’s seemed this year in particular.
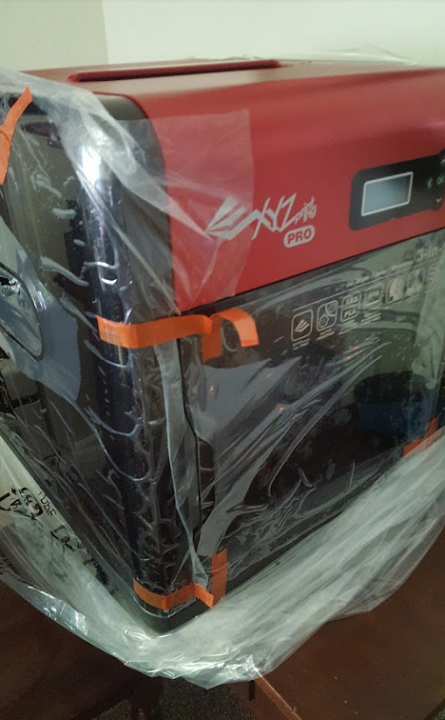
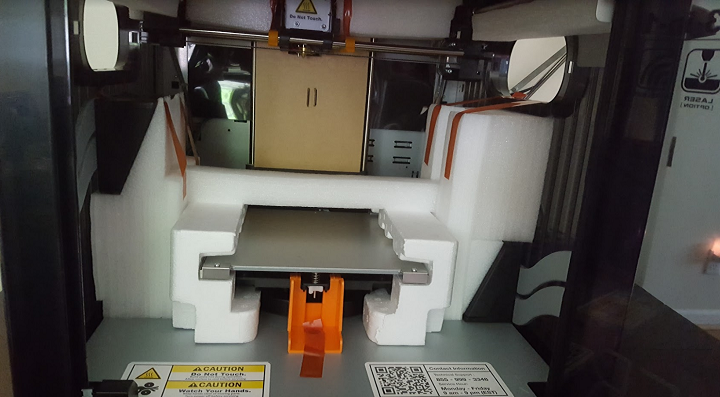
Unboxing the da Vinci 1.0 Pro 3-in-1 was a pleasant experience. The company that leads in desktop unit sales certainly knows how to get a printer to a customer safely; despite some dings in the large box from its experience in shipping, the machine itself was spotless, safely housed in styrofoam and taped and zip tied to keep all moving parts secured in transit. This AiO unit is certainly big, too; I hadn’t cleared enough desk space for its 18.4 x 20 x 22 inch footprint at first, and it covered the fairly small desk in my office for the duration of its stay here. I quickly set to work getting the machine and my system set up.
Please note that the following includes my personal experience testing this machine out, and may not be indicative of every user’s experience.


3D Printing
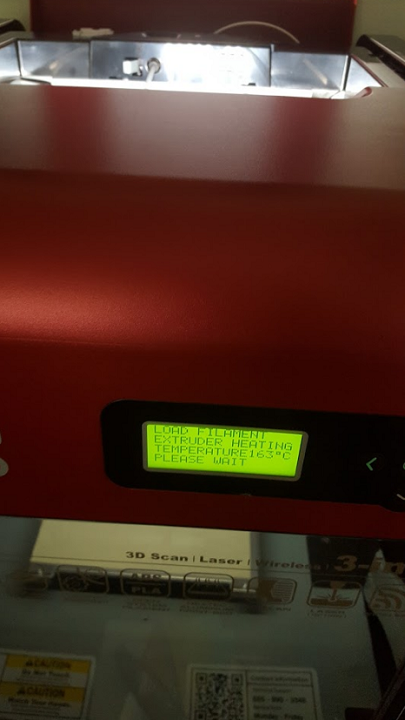 Setup was a breeze, and any questions I had were quickly answered as the XYZprinting website comes with a ton of useful information and videos to ensure a smooth unboxing and setup process for a new user. The bed leveling process did take some time, but here the tutorials again came in handy, as it took a few tries to get the print bed level and ready to go. The filament also gave me a bit of hassle about loading properly, but we sorted through our differences amiably enough, and I was soon ready to go with the white ABS filament that had been included in the package. (This machine is capable of printing with non-proprietary filament, as well, which is a nice new feature from an XYZprinting printer. For the purposes of this review, I used only ABS filament that I received from the company, but it was easy to see where to tweak settings for filament not in their chipped cartridges.) I also learned that I do not have the knack for putting down layers of tape easily, which I should have known from previous attempts at putting up vinyl wall clings in my home; XYZprinting had included large sheets of masking tape in just the right size to lay down in one piece on the print bed. Mine never came out smoothly, but the few bumps and rips that resulted from my inexpert application rarely had implications on the print jobs attempted.
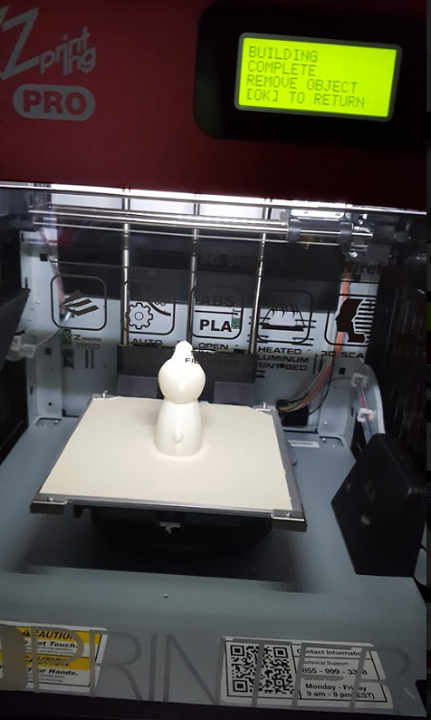
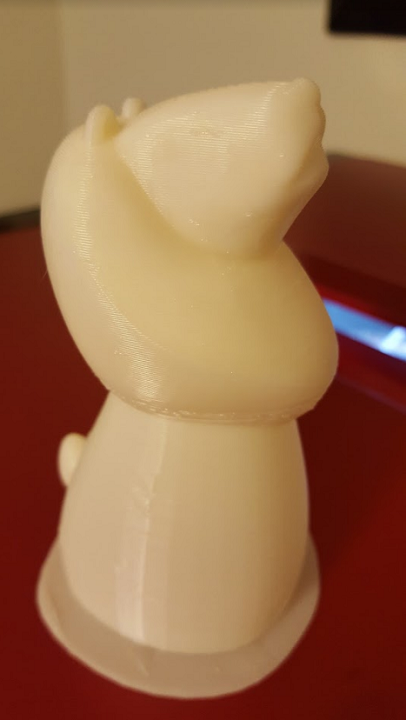
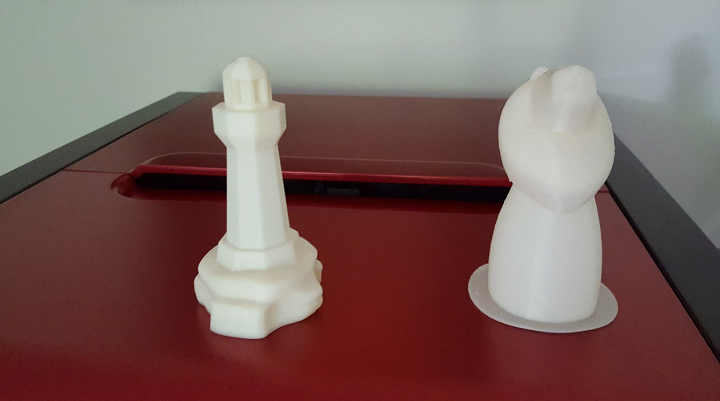
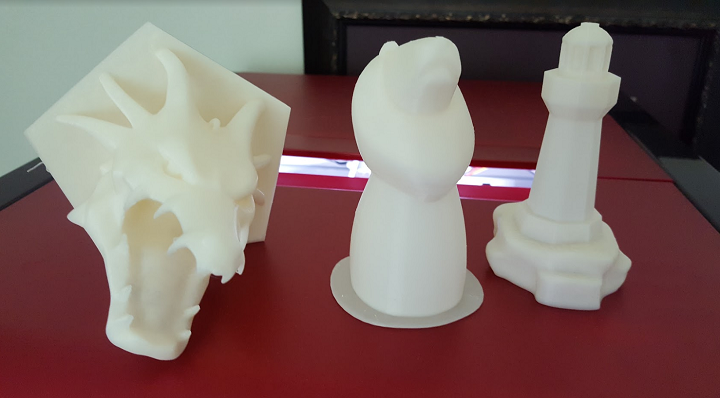
Included with the machine was a CD with XYZ’s 3D printing software; the CD wouldn’t read or install on my computer, so I had to download the XYZmaker software from the site. This was no biggie, and the site certainly made the process easy. Granted, I didn’t even need the software as I initially got set up, as the printer came with a couple of pre-loaded test prints. I set the first, a lion, to printing as soon as I had everything set up. I quickly followed that successful test print up with the other pre-loaded file, a lighthouse. There were no problems with either print, both coming out pretty quickly as easy, hollow prints to showcase the ease with which the printer could be controlled just by the unit’s buttons and easy-to-read screen.
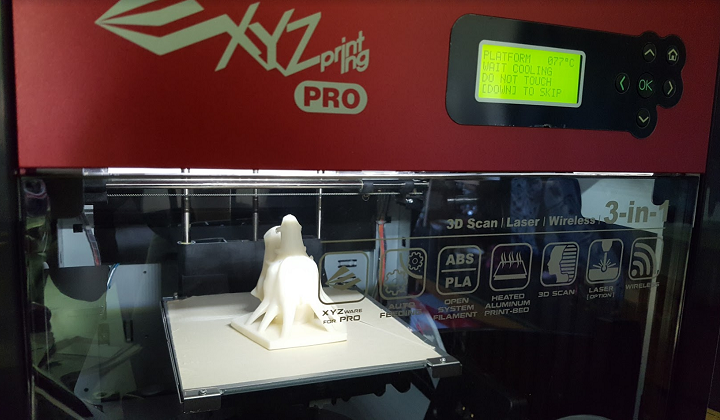
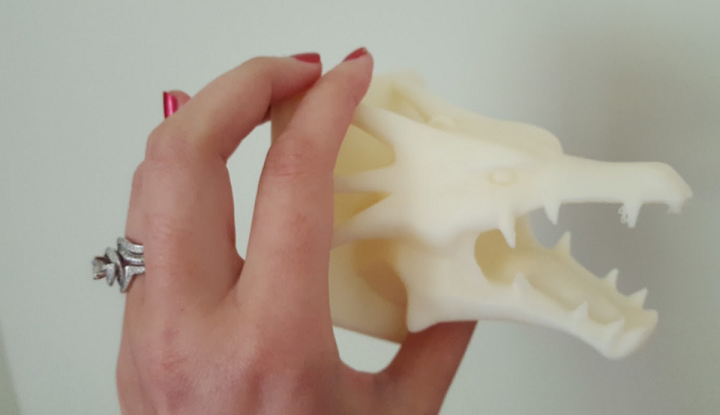
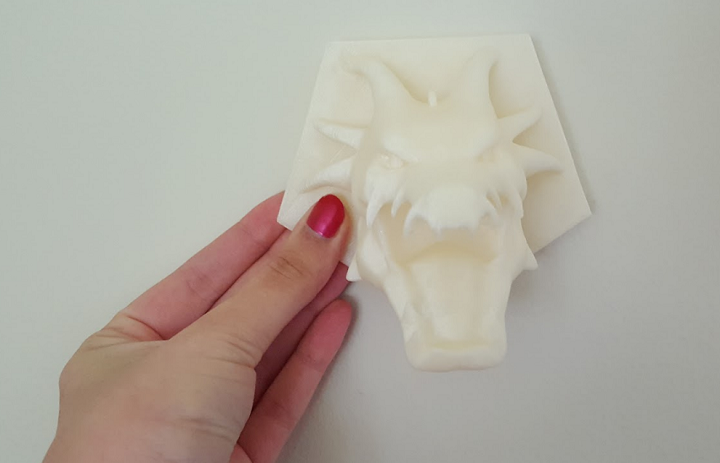
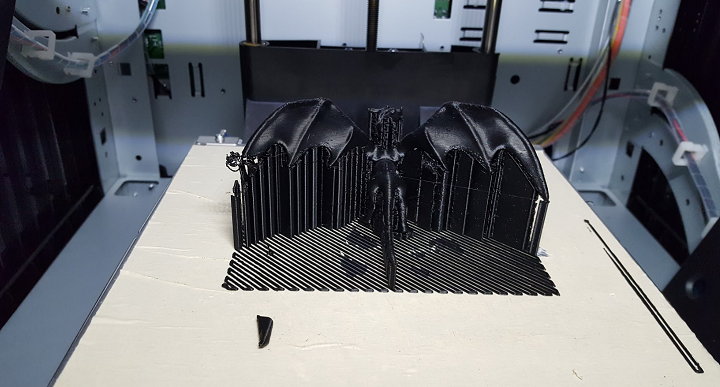
The next obvious step was to turn to non-loaded files and start printing out chosen projects. I turned to Thingiverse to start, and soon had a Mounted Dragon Head designed by lukibob in the works. This design offered a nice base to print, as well as some detail work to highlight what the printer could reasonably accomplish. The print turned out quite nicely. The detail was nicely done, with just a bit of stringing on one of the dragon’s teeth.

And just like that, I was off to the races, printing up a storm. Among the files I chose to test the printer were:
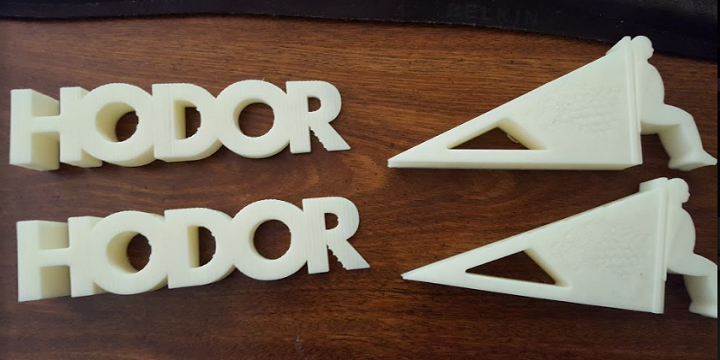
Though I had told Scott when he wrote up his 10 3D Printable Hodor list in May that he was a bad, bad man for running that list, I admit that I printed two of them. This was my first run with including multiple files on one print bed, and the software and printer both handled it admirably.

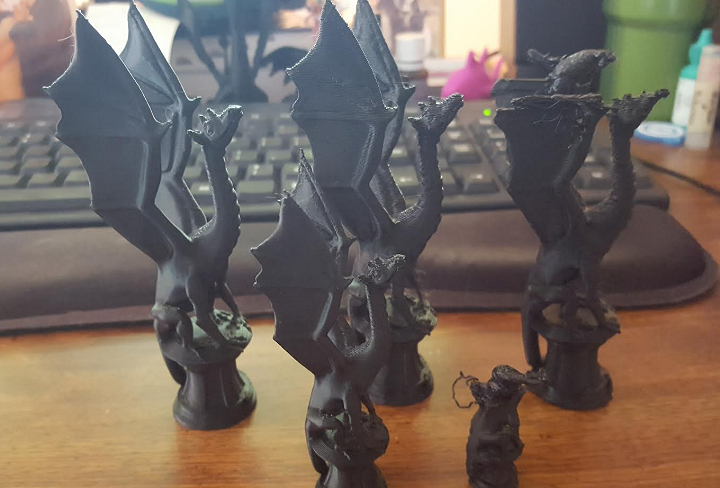
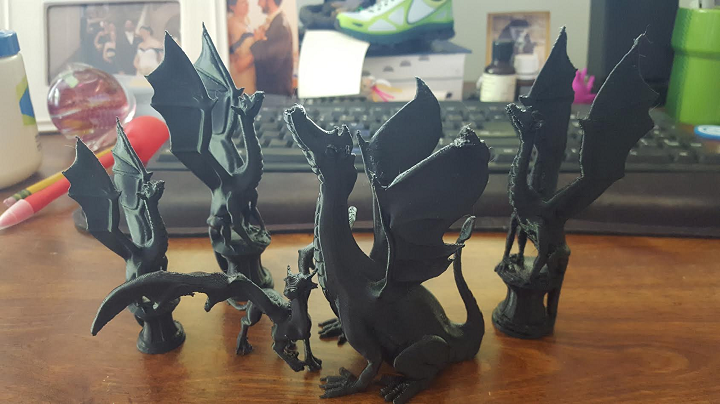
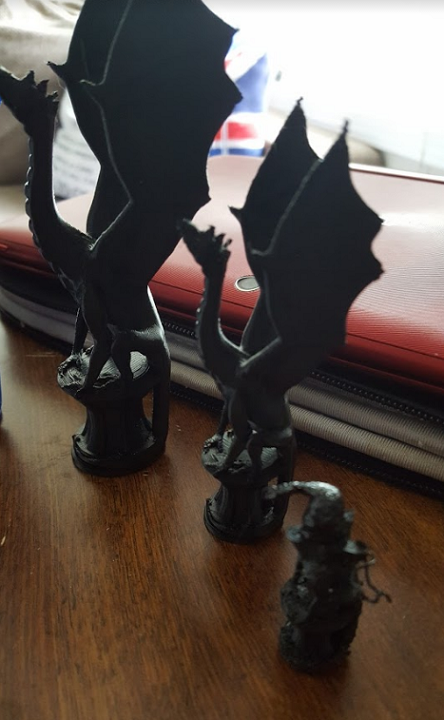 Both designed by Loubie, these dragon designs showcased detail work. I had in fact printed Aria earlier — the design was the first I had ever 3D printed myself, at Dayton’s Proto Build Bar, using a MakerBot Replicator. By printing a design I already had on my desk, I was able to do an apples to apples comparison of a print. I took the opportunity as well to print Aria in a few sizes and resolutions. At the standard size with the finest resolution available to me, Aria came out beautifully. The standard resolution came out nearly identical to the previous version I had, though it wouldn’t be hard to note that the version printed on the MakerBot had come out a bit better, as the new print had a few gaps in layers in the wings, as well as a couple of flubs higher on the wings that, in the next print at a lower resolution, repeated and failed in lumps of melted plastic before the top joints on the wings. At 75% scale, a smaller Aria stood successfully tall; at 50%, Aria failed pretty fully. The base printed, the legs had major stringing, and before the wings could start, the model became a lump. Still, I was impressed overall with the performance on the repeated Aria testing, and it’s important to know what the resolution limits are. I only tried Adalina once, and she came out overall well, though one wing gave out a bit right at the top tip.
-

- Side by side comparison with MakerBot (blue) print

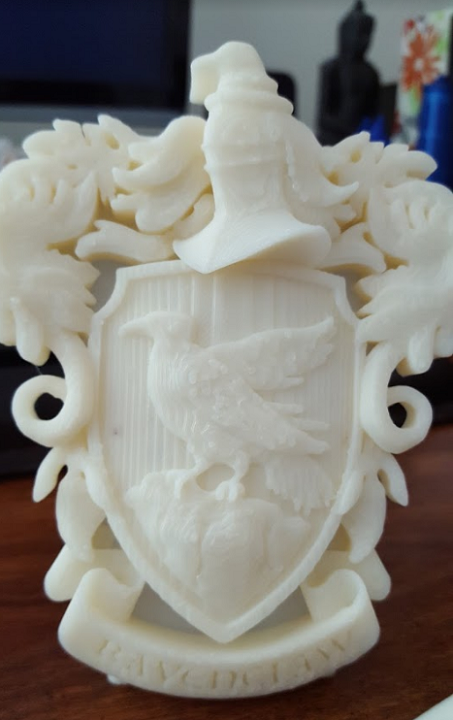
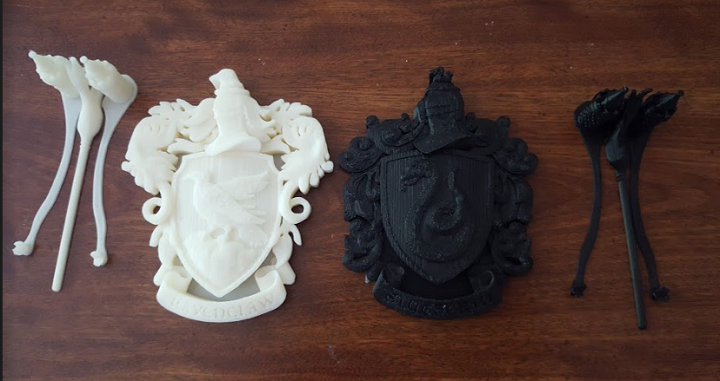
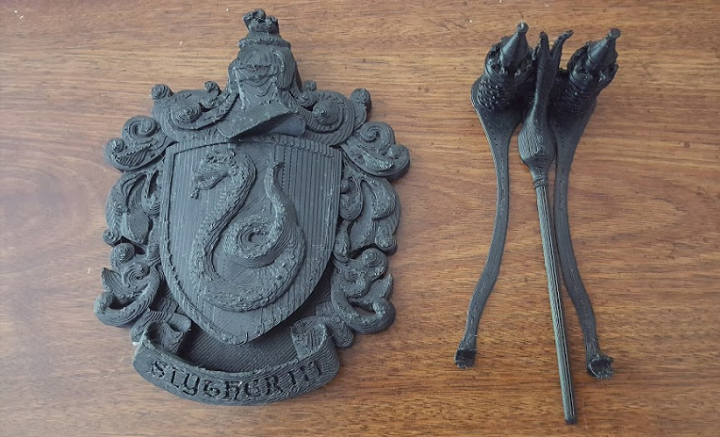
- Ravenclaw Coat of Arms Wall/Desk Display – Harry Potter
- Slytherin Coat of Arms Wall/Desk Display – Harry Potter
Both coats of arms and stands were designed by andrewforster. The Ravenclaw design, in white, was the first print I tried with two components and where one had a moving part (the hinged stand). I was impressed with how this came out, and tried it again later, in black ABS, for Slytherin. For some reason, this one came out slightly less nicely, but it and the stand are both still display quality.

My niece’s fourth birthday came up around this time, so I made her a 3D printed Elsa (of course). The figure came out perfectly, and I also made my six-year-old nephew his own set of 3D printed Minecraft tools so he wouldn’t feel left out at the party. Both went over well with the kids (and my sister) and made appearances later at show-and-tell.


Among other designs I 3D printed, with no failures or major issues, were:
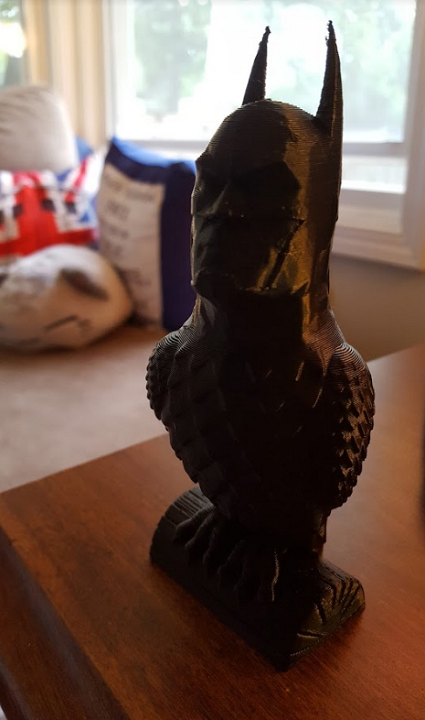
- Batowl! by sorenrd
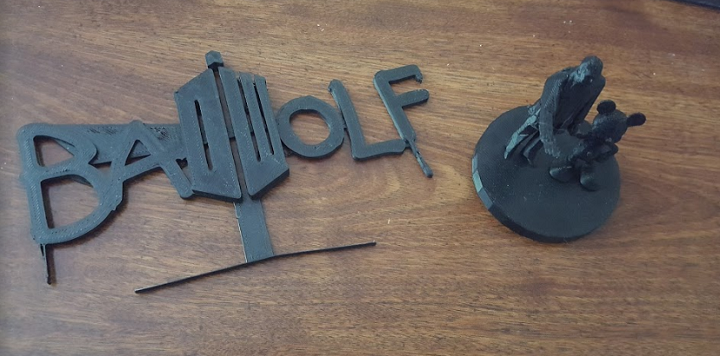
- Doctor Who Quote. and Doctor Who – Bad Wolf by AwesomeA
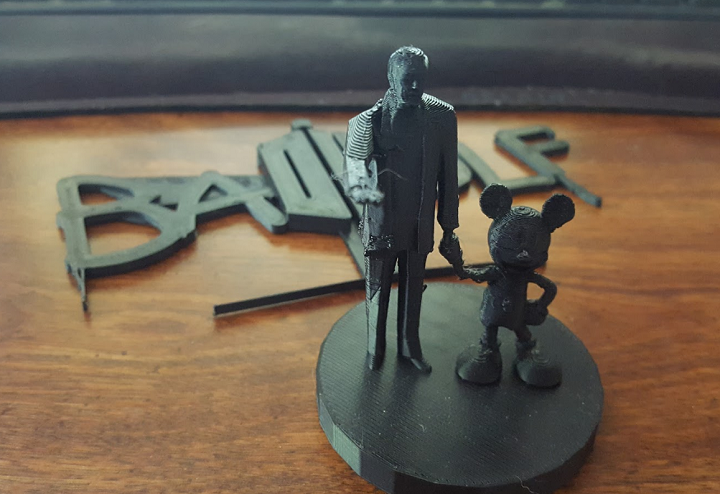
- Disney Partners Sculpture at Disneyland Resort, California by Scan The World
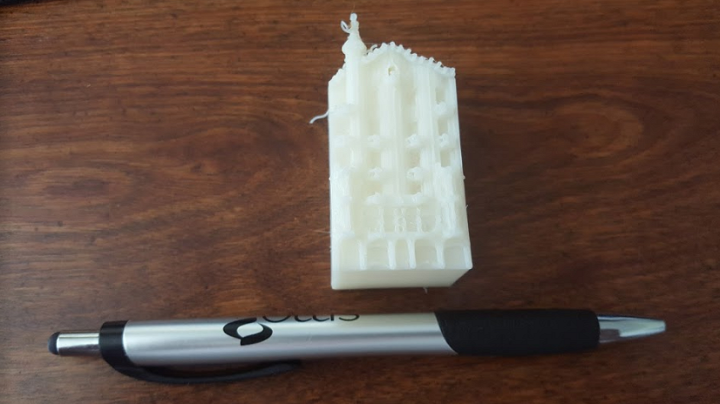
- Casa Batlló, Barcelona by MiniWorld
- Dragon by Martin Conrad
-

- Dragon (smallest) shown alongside Loubie’s Adalina & Aria
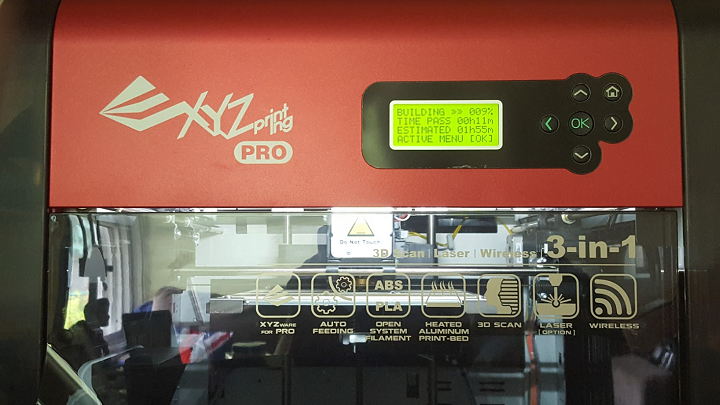
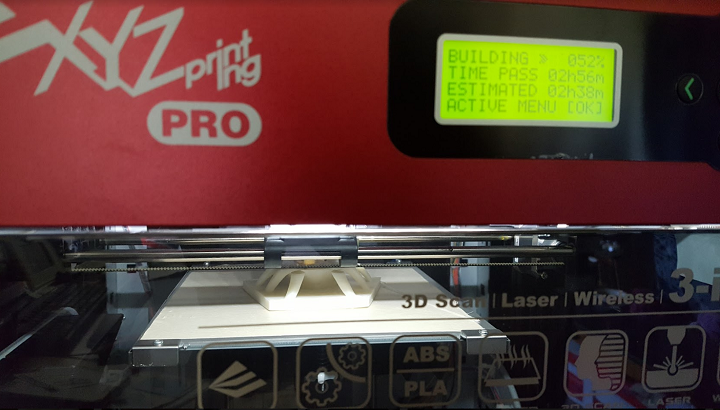
The heated print bed was a nice touch, though I did have a few days of trial and error to find the optimal printing temperatures to get all my prints to adhere successfully. This part of the process was frustrating, but not insurmountable. I had a tendency to murder the tape on the print bed, as removing the prints sometimes caused me to dig a little deeply with the tool to remove them. When prints did adhere correctly and got to printing, I also learned that this is not the fastest 3D printer on the block. I appreciated the screen that kept me up to date on print progress, including percentage complete, time elapsed, and time remaining in each print, and noted that these estimations were pretty accurate.
While many users have been looking forward to XYZ opening up material options to allow for use of non-proprietary filament, I did enjoy the ease with which the chipped cartridges from the company were loaded and read, and appreciated the tracking of how much filament was left on the spool (which, as it was in the cartridge, I could not eyeball). Resolution was generally in a good range, though no one would mistake anything I printed for anything other than a layer-by-layer build off a 3D printer. It was easy to tweak settings to adjust resolution, speed, etc., in the software.
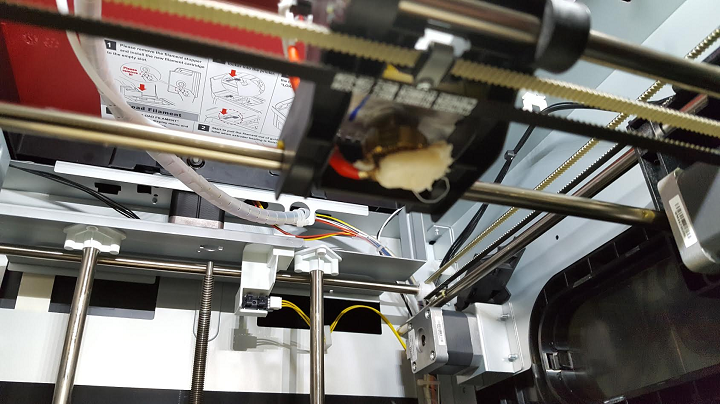
One thing I noticed between prints was that I had to clean the print head off pretty frequently. The included copper brush was used pretty frequently, and after I took the extruder module off to swap out for the laser engraver module, I had some more cleaning to do. There were also a few instances of pretty total failure, where filament melted on/around the extruder; these were a pain and required some time to clean up (especially if I had left the room when it happened, and the melted plastic had had time to really gather), but they weren’t the norm of my experience. I definitely put all the tools XYZprinting had included in the box to use throughout my time with this unit.
3D Scanning
With an overall successful experience in 3D printing, I turned next to the machine’s other capabilities. The 3D scanner was incorporated right into the machine, so I downloaded the XYZscan software and set out to test the scanner. Unfortunately, I never had any success with a complete 3D scan. Part of this I will definitely chalk up to my computer’s less-than-stellar capabilities. While I am now using a newer laptop for working with 3D files for another review unit, I did not have the newer computer at the time of this review, so have only my lovely refurb desktop.
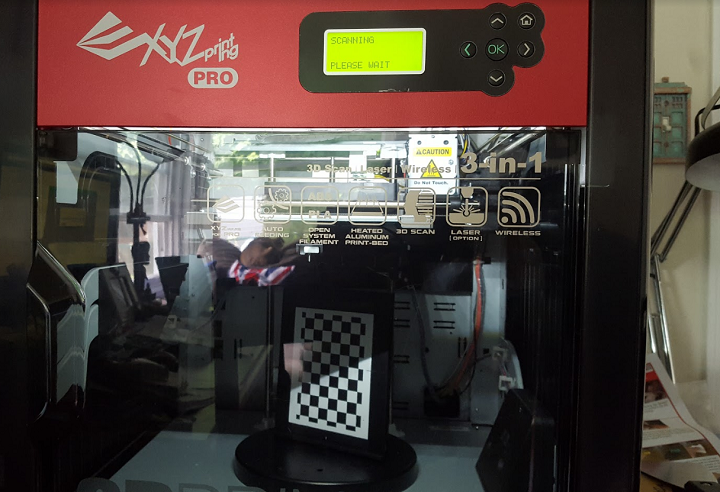
The first time I tried the scanner out, I couldn’t get a proper read on the included calibration piece. (And yes, though the photos included here are a bit well-lit, I did close the blinds as well for a dimmer room ambiance during scan testing.) I tried to move forward with a test scan without a completed calibration, but as I’m sure could be guessed, this didn’t go well. I turned back to 3D printing, as by this point a new package from XYZprinting had arrived with the laser engraver module and another cartridge of ABS filament (black, this time), so I could continue working with the machine. When I came back to 3D scanning again toward the end of that process, I was met with barely better results. I attempted to scan a simple figure I keep on my desk (it’s Doctor Hooves, in a simplistic shape that should have made for a somewhat accurate scan), and then attempted to scan the mounted dragon head I had printed earlier.
-

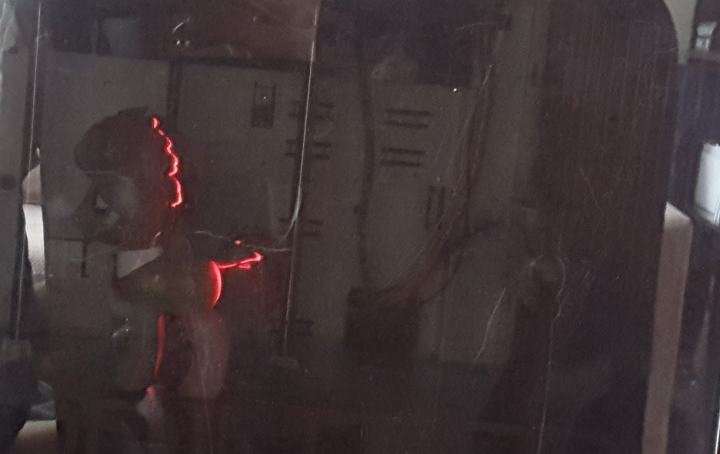
- I got used to this screen.

My intention here was to scan an object, turn that into an STL file, and print it to see how it compared to the original. I met no success in this endeavor, and did not come away with a single usable scan file. When I tried to fix one of three completed scans using the integrated fixing features in the software, the software crashed fairly spectacularly, freezing both my computer and the AiO. Next time I had a completed scan, I tried to just send it as-is to the printer to see how it would turn out in 3D print, errors and all. This also failed. The scanner is a good idea to include in the machine, and having a combined product seems sound. I am not willing to write off this particular machine’s 3D scanner as a wash, and I’m sure someone with a better computer and more patience will have had some success. It won’t be the best 3D scanner out there, but the resolution and capabilities promise to carry through for small desktop projects and recreations.


Laser Engraving
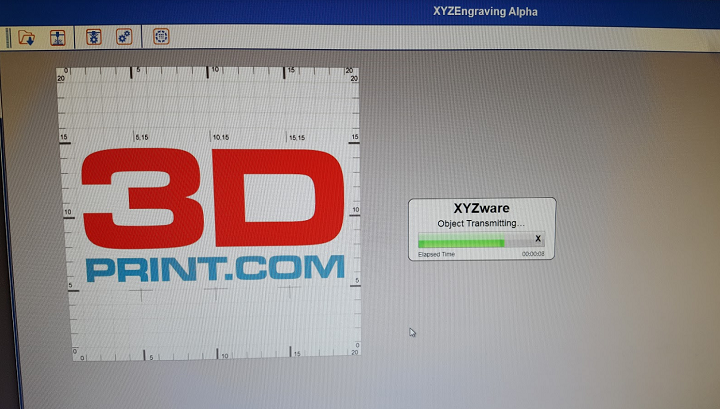
 The third aspect of this 3-in-1 machine is its optional laser engraving module. The module is an add-on to the initial machine purchase, priced at $199, but it was the unexpected star of the show for me. I’ll be frank: I hadn’t expected to care much about the laser engraving capabilities. But when the box came with the module, I was cautiously optimistic. It was easy to follow XYZ’s instructions to swap out the extruder for the laser engraver module, and the whole switch of the two heads only took a few minutes, half of which was me flipping through instructions.
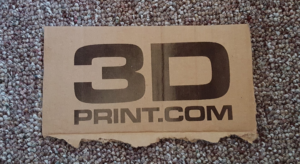
It’s noted to be able to engrave on materials including wood, leather, and cardboard; of these, I only had some spare cardboard around, so that was what I used. By the end of the included test engraving, I was scouring the house for more boxes to rip up to sacrifice to the engraver, and was very upset when one piece of spare, untreated wood we found was way too big to fit into the enclosed print bed area for safe engraving. The laser engraver was a champ.
-
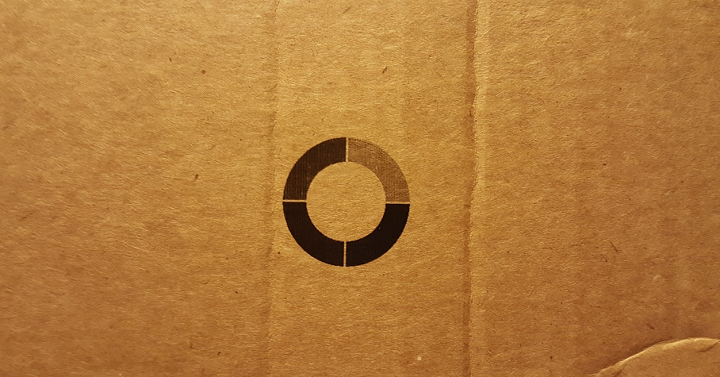
- [Image: Sarah Goehrke]

The engraver offers the options for Vector or Raster designs, with Vector promising simpler/single-color designs, and Raster able to detect more gradation in shading. I mostly stuck with Vector. Both have options to play with to get the results you’re looking for. The engraving process itself did not take an especially long time; I was pleased with the speed particularly as I was working with cardboard, and had the printer set up in my office, where my desk was between the printer and the wide open windows.
My test engravings included our own logo, as well as a couple of (shockingly) dragon designs. These dragons I was particularly curious to see translated into laser engravings, as they are all tattoos I have that had been translated first from ink drawings (with the bottom one Tolkien’s original line drawing of Smaug from The Hobbit). All of these came out very nicely, overall. The creases in the cardboard prevented perfection in a few places, but the promise was there, as well as the accuracy in smaller areas of detail. I didn’t go for designs with a lot of shading, though the test design that was loaded with it showed off these capabilities nicely.
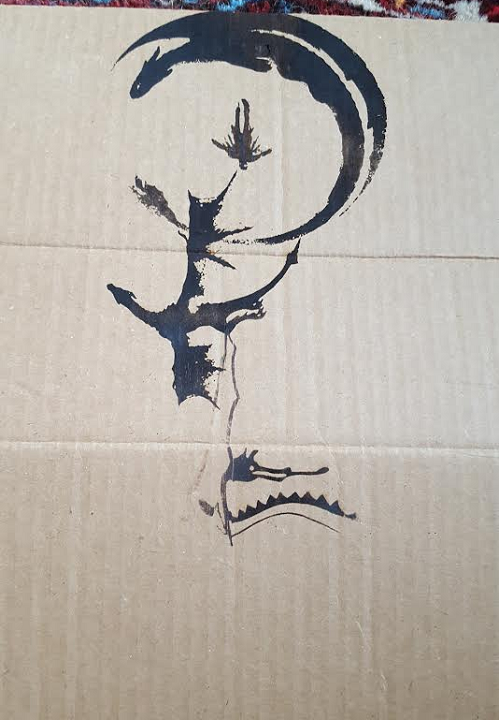
I did these designs one at a time; their not-great placement is my fault. The bottom design did not come out in its entirety.
Overall Impressions
The da Vinci 1.0 Pro 3-in-1 is a great desktop unit. It delivers on capabilities in 3D printing and especially in laser engraving, though the 3D scanning leaves some to be desired. All in all, I’d say I have faith in this machine as a good product. Priced at $899.95, with the option of adding the laser engraver module for $199, this is definitely a good value for the money. It’s not an industrial machine, so there is better quality (and speed) that can be found on the desktop; at this price point, though, this machine is very attainable for a number of users and fit for a number of applications.
On the whole, I had a good experience with this machine. The team at XYZprinting were easy to work with, and offered assistance with any issues that came up; their help line is even included under the print bed, ensuring that all users know that help is only a phone call or video tutorial away. Due to some communication/personnel issues, I kept the da Vinci Pro 1.0 3-in-1 for longer than I’d intended, but after all that, I have to say — I already miss it. Discuss in the da Vinci Pro 1.0 3-in-1 forum at 3DPB.com.

Subscribe to Our Email Newsletter
Stay up-to-date on all the latest news from the 3D printing industry and receive information and offers from third party vendors.
You May Also Like
Air Force Awards Fortius Metals $1.25M to Qualify 3D Printing Wire for Hypersonic Applications
AFWERX, part of the US Air Force Research Laboratory (AFRL), awarded a Direct-to-Phase II Small Business Innovation Research (SBIR) contract worth $1.25 million to Colorado’s Fortius Metals, to accelerate qualification...
US Air Force Awards JuggerBot $4M for Large-format Hybrid 3D Printing
Large-format 3D printer manufacturer JuggerBot has received a $4 million grant to develop a large format 3D printer, courtesy of the Under Secretary of Defense, Research and Engineering Manufacturing Technology...
Where Have All AM’s Unicorns Gone?
In the rapidly evolving world of 3D printing, startups valued at over a billion dollars, known as unicorns, once seemed as fantastical as the mythical creatures themselves. While a few...
How My Childhood Fascination with Planes Led to Investing in 3D Printing
My fascination with aerospace started young, and I started studying planes–identifying them in the sky and learning everything I could about how they work. Fast forward to my first week...