3D Printer Review: MakerBot Replicator+

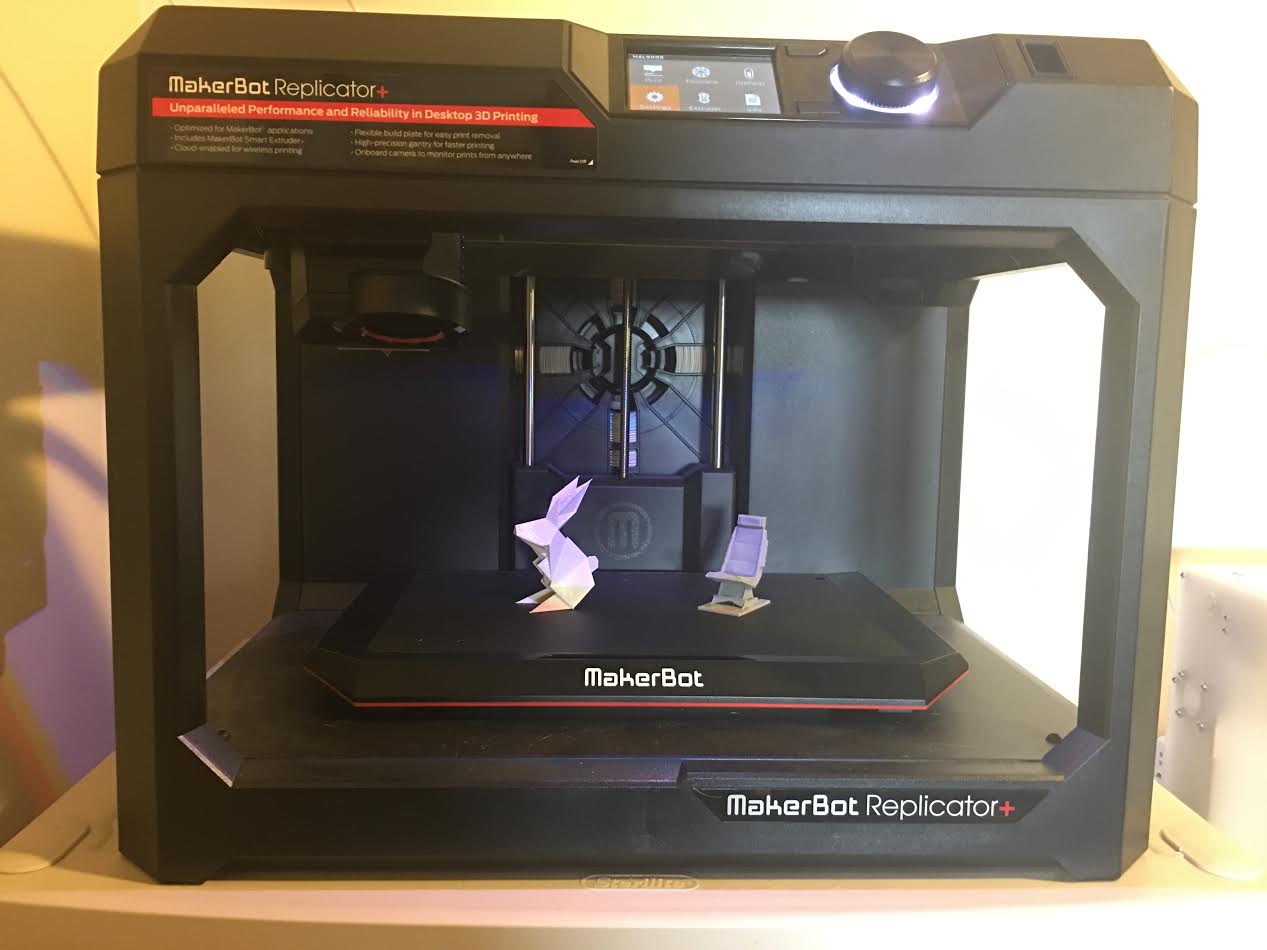
![]() It never ceases to amaze me all things that 3D printing is capable of creating and just how far the industry has come over the past several years. I recently wrote about how easy-to-use 3D modeling software, like Morphi, has made 3D modeling more accessible. The current crop of 3D printers are making 3D printing so much easier than it has been in the past. MakerBot, once synonymous with desktop 3D printing, has seen its ups and downs, especially since being acquired by parent company Stratasys, but the plucky company continues to innovate. The much maligned Smart Extruder, which was designed to make printing on MakerBot 3D printers foolproof, turned out to be quite the opposite experience for users, but the redesigned Smart Extruder+ ostensibly has fulfilled its original promise. I got the opportunity to test the company’s new flagship 3D printer, the Replicator+, which was unveiled last September, and experience for myself what 3D printing with the newest MakerBot tech is really like.
It never ceases to amaze me all things that 3D printing is capable of creating and just how far the industry has come over the past several years. I recently wrote about how easy-to-use 3D modeling software, like Morphi, has made 3D modeling more accessible. The current crop of 3D printers are making 3D printing so much easier than it has been in the past. MakerBot, once synonymous with desktop 3D printing, has seen its ups and downs, especially since being acquired by parent company Stratasys, but the plucky company continues to innovate. The much maligned Smart Extruder, which was designed to make printing on MakerBot 3D printers foolproof, turned out to be quite the opposite experience for users, but the redesigned Smart Extruder+ ostensibly has fulfilled its original promise. I got the opportunity to test the company’s new flagship 3D printer, the Replicator+, which was unveiled last September, and experience for myself what 3D printing with the newest MakerBot tech is really like.
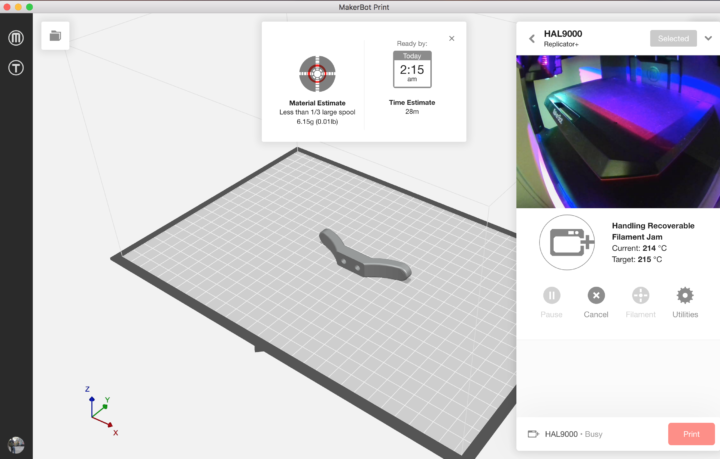
Setting up the Replicator+ was very easy and I didn’t run into many hiccups. It’s nearly plug-and-play; there isn’t much to assemble, just snapping on the Smart Extruder+ which magnetically adheres to the gantry. The first time I attached the Smart Extruder+ I got an error message that it wasn’t properly seated. As the Smart Extruder+ connects to the backside of the gantry, it was hard to see exactly what the problem was, but on the second attempt it snapped right on. In fact, the extruder worked very well, I didn’t have a clog or a jam, which I seem to regularly have the first time I run a new 3D printer. It performed nearly flawlessly. I had one problem when I switched filament and the filament didn’t load properly. When the Replicator+ tried to print after the filament change it detected the problem and tried to recover automatically, which was interesting to observe, but was unable to. Upon closer inspection, I noticed the filament had a slight bend to it and after I cut off a small section of filament it loaded fine. I think that the filament would have loaded easily on most 3D printers with that small bend, but the Smart Extruder+ just wasn’t having it. Love it or hate it, the Smart Extruder+ is pretty reliable, but if you do get a clog or a real jam, there really isn’t a way for you clear it yourself.
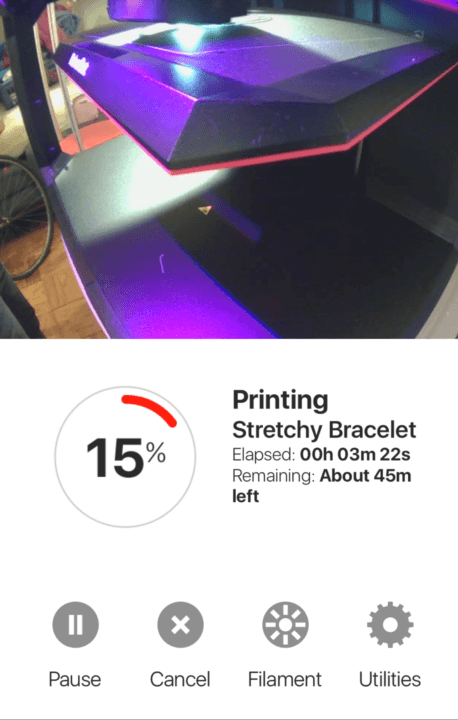
WiFi printing, which may have once seemed to be gimmicky or just a nice little extra, is actually a very useful feature. I found the setup, starting prints through WiFi and remote print monitoring to be a cinch and very useful. Aside from some lag on the camera updating, WiFi printing was pretty responsive. Speaking of the camera, you can take snapshots using the menu on the Replicator+, and while I didn’t see this functionality in the app, its still a nice feature and something I haven’t seen on a lot of other camera-enabled 3D printers.
-

- The MakerBot app makes remote print monitoring easy. You can even send files from Thingiverse directly to the Replicator+ through the app
-

- WiFi printing works very well. It alerted me that there was a filament jam that the Smart Extruder+ was attempting to fix automatically
-

- MakerBot Print will give you estimates of print time and show the print layers. It also slices very quickly, usually within a minute or two
You can find prints through the MakerBot app on Thingiverse and send it to print from there. When I first used the app, you could only print models that were in your library, and the only way to add them to your library was through the computer, outside the app. I found that to be a little annoying, but with subsequent updates to the app, you can now search for a model on Thingiverse through the app and print it directly from there, without even adding it to your library. I would like to see the ability to print files through the app, found on other popular 3D model sites like Pinshape, but that is a relatively minor gripe as there are tons of files to be found on Thingiverse.

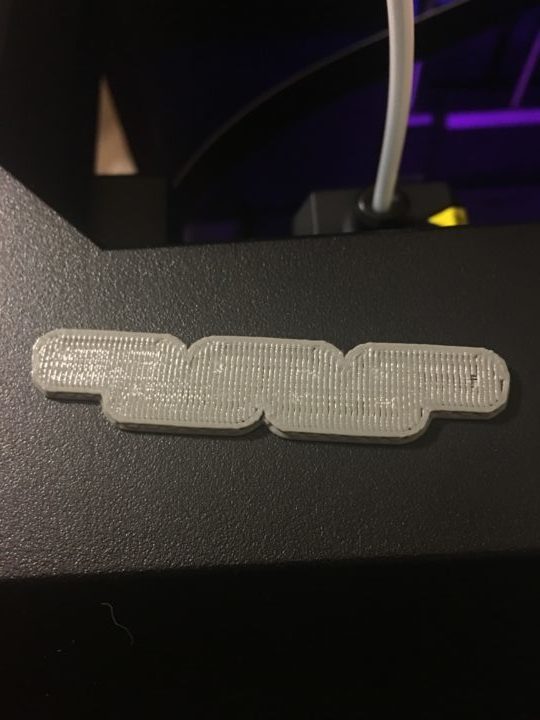
20mm cube print
Print quality was less than desirable. On a beginner 3D printer, very noticeable offset layers may not be much of an issue; on a 3D printer that is marketed towards professionals, it’s not really acceptable. According to the MakerBot representative I spoke to, the Replicator+ doesn’t get as good print quality as a dialed in Replicator 2. Also, as this was an early unit, it might just be a lemon. Repeated attempts to improve print quality didn’t help, until the latest firmware updates to the printer and software update to MakerBot Print. Print quality did see some improvement after the updates, but has a way to go to be on par with similarly priced professional desktop 3D printers.
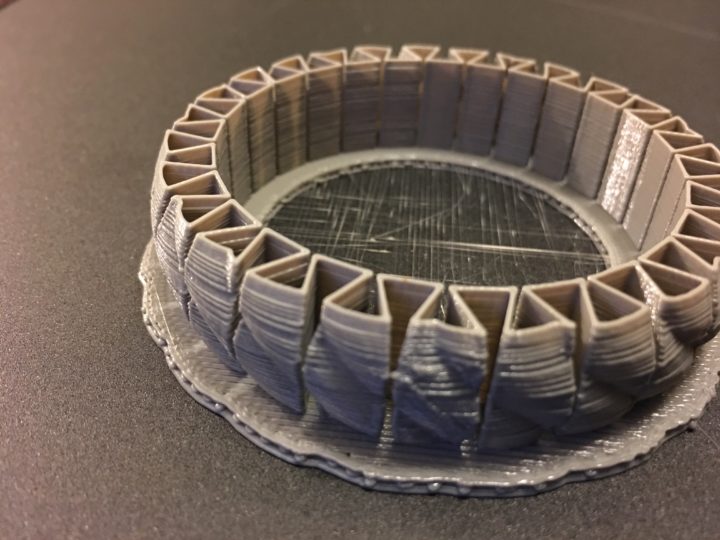
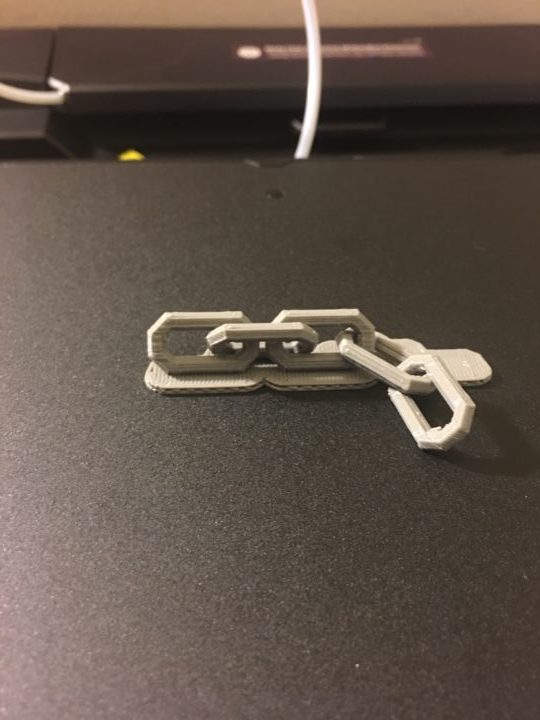
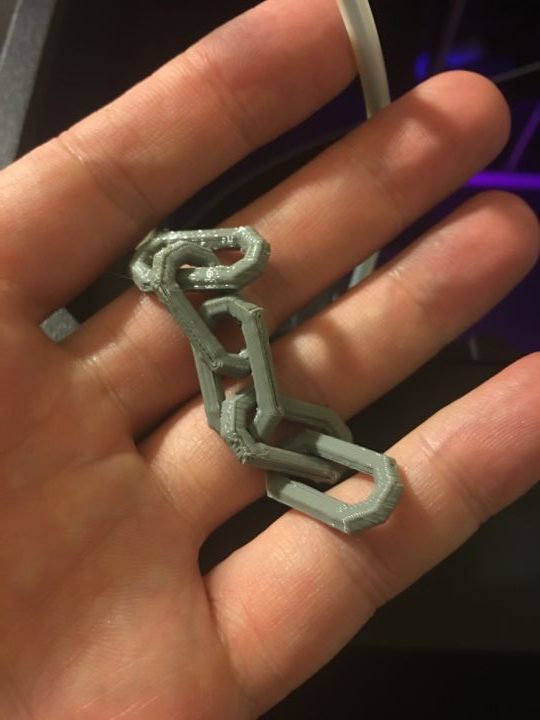
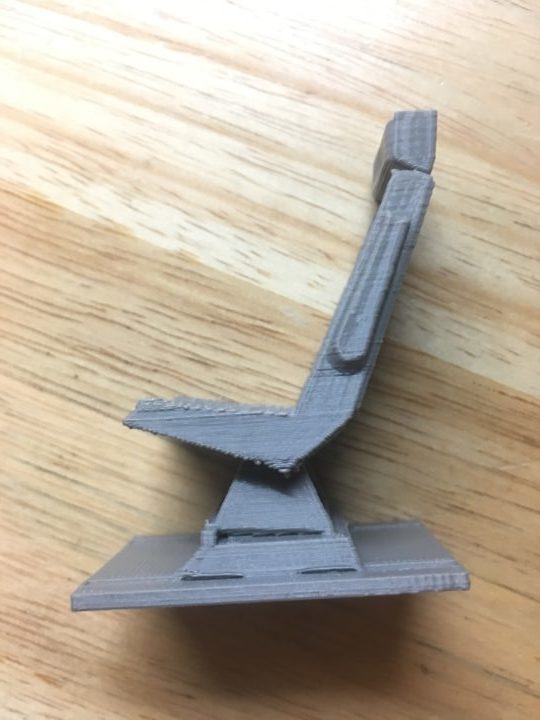
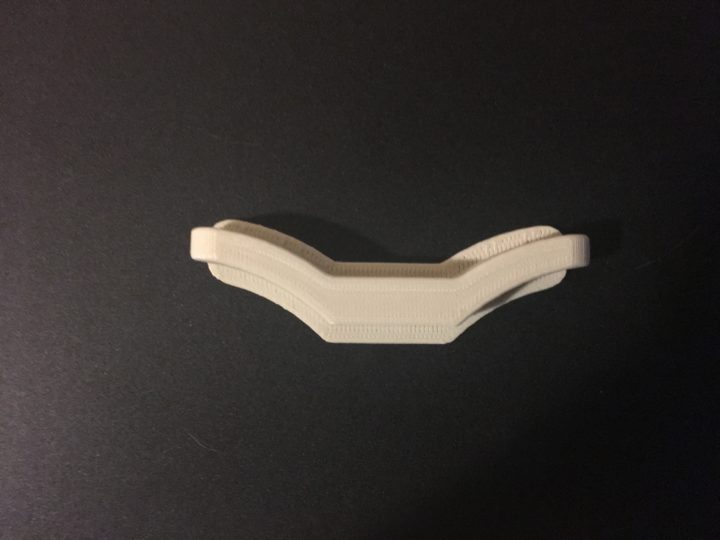
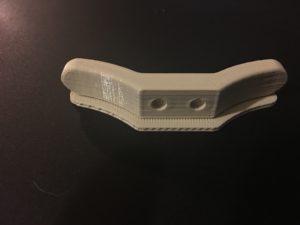
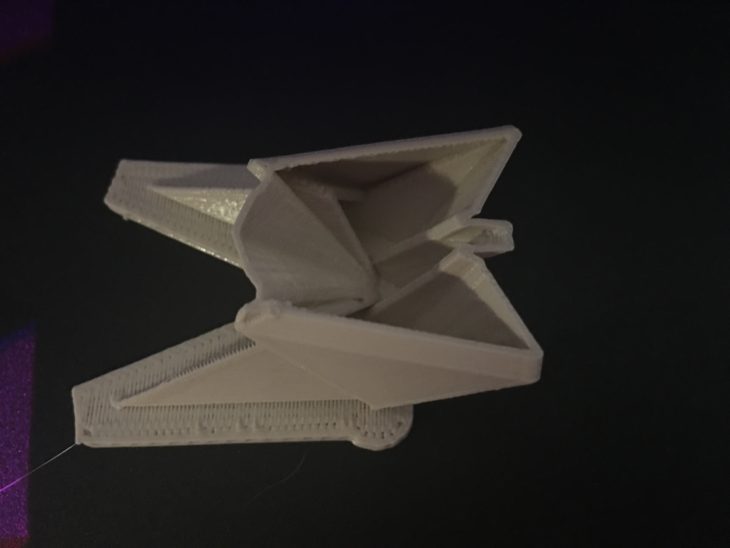
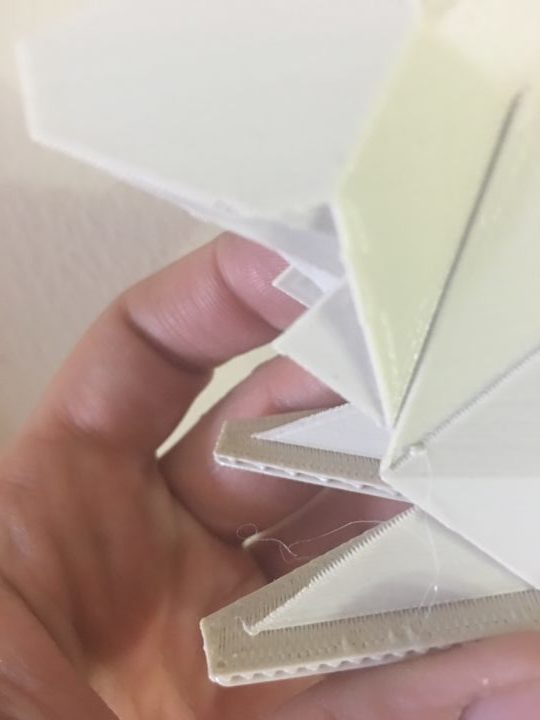
The first things I printed on the Replicator+ were some of the included model files on the internal memory; the stretchy bracelet, chain links, and 20mm box. All printed successfully, but the layers were very visible and not completely accurate. I moved on to some more challenging prints. A spaceship chair that I modeled (based on Ron Cobb’s concept art from Alien) had some difficult overhangs that looked to be good test for the printer. It handled the overhangs very well, but again print quality was subpar.
-

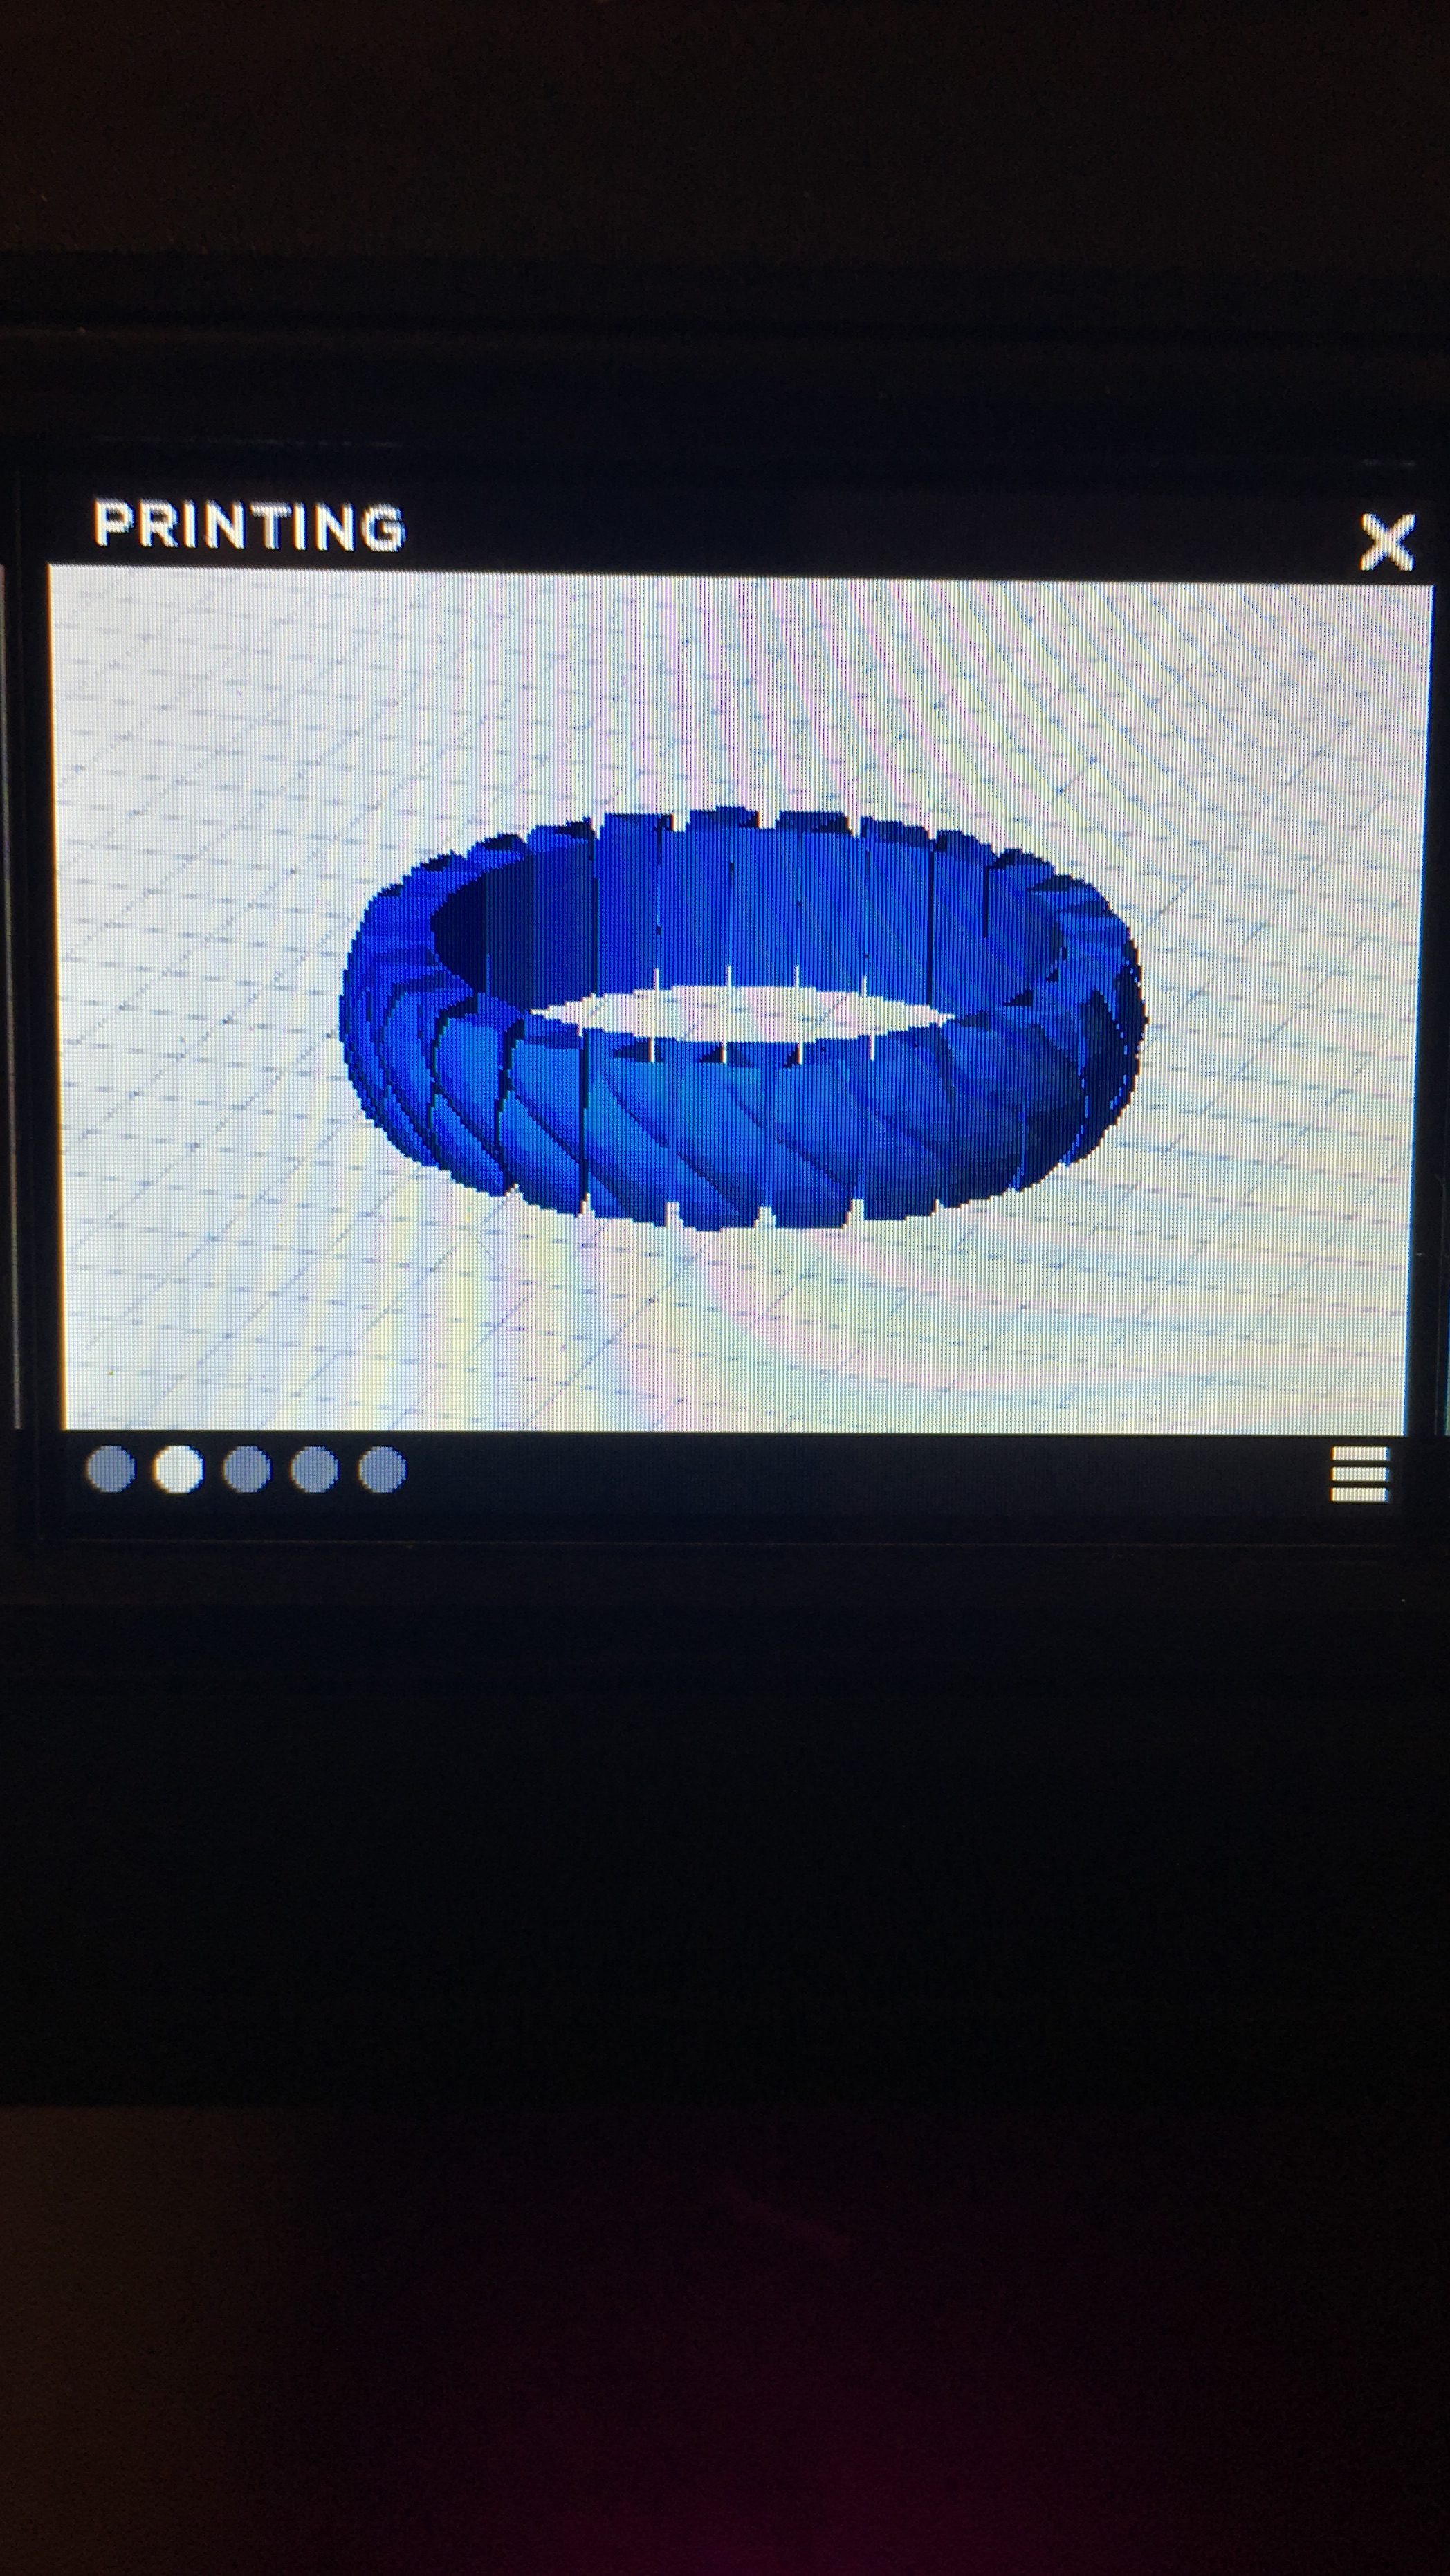
- The stretchy bracelet is an example model file preloaded on the Replicator+
-

- The stretchy bracelet didn’t print very cleanly
-

- Everything prints on a raft automatically
-

- An example of a Replicator+ raft

-
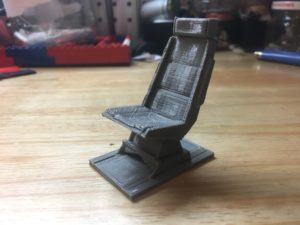
- While the Replicator+ did a good job of handling overhangs on my spaceship chair model, print quality wasn’t great


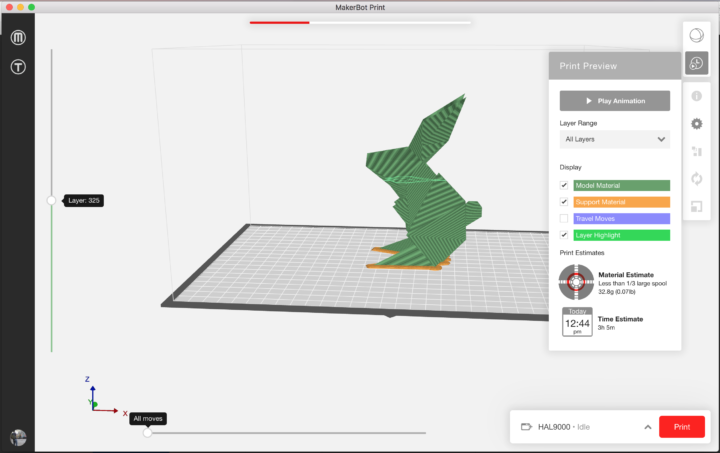
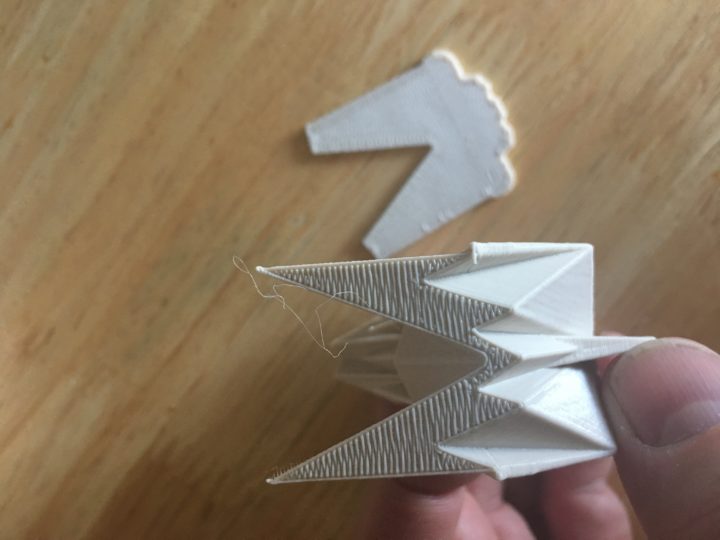
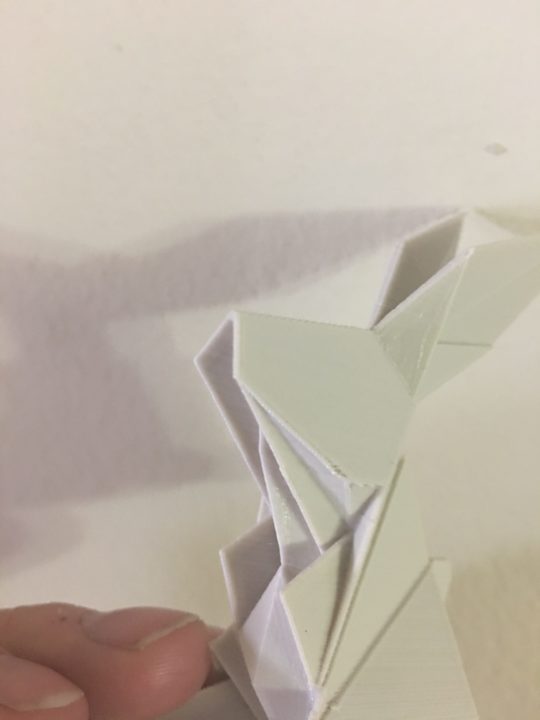
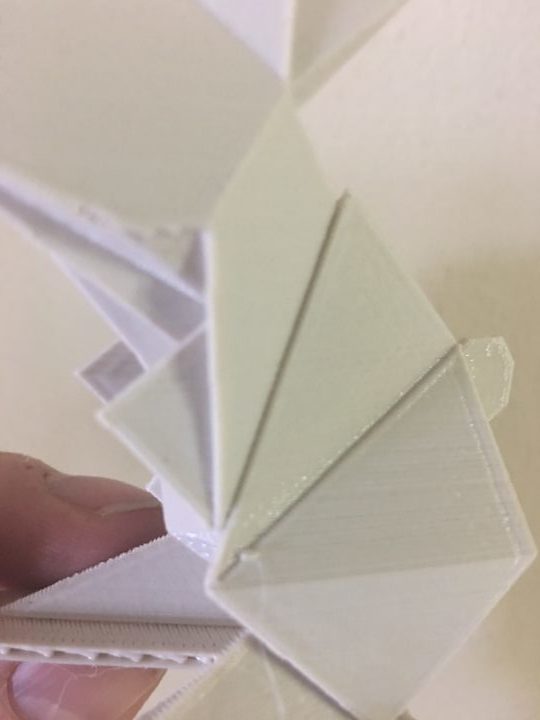
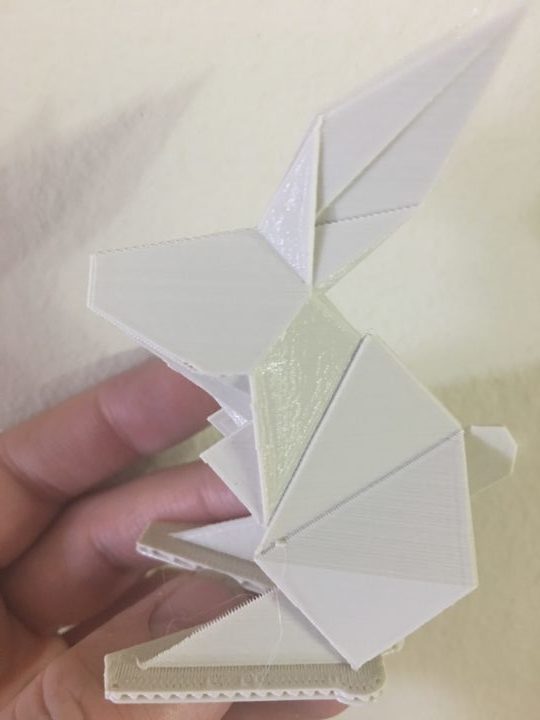
After the latest updates, I printed the Oragamix_Rabbit by Mirice, found on Thingiverse, at 200 microns using the new MinFill setting, which is meant to print quickly with a minimal amount of infill. Layers were decent, with the improvement I noted above, but there was noticeable stair stepping on certain parts of the model. I don’t care for some of the locked-in functions in MakerBot Print, such as having to always print with a raft. The rafts are very easy to remove, but you won’t get a smooth bottom layer surface like you would on some other 3D printers. As a designer, I’m not a fan of that. I’d really like to see MakerBot give more control of slicing functions back to the user.
-

- Print quality improved somewhat after the latest update
-
- The Replicator+ did a good job of printing true circles

-

- MinFill on the Origamix_Rabbit created a mostly hollow model that printed rather quickly
-

- Raft removal is easy but leaves behind a rough bottom surface
-

- Overall print quality showed some improvement
-

- Noticeable stair stepping on the print
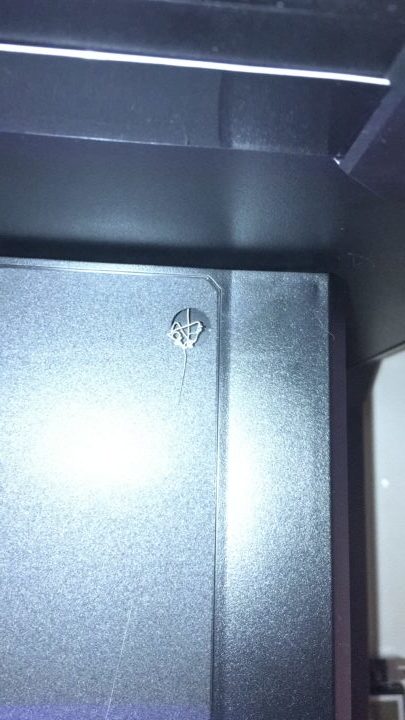
The build plate on the Replicator+ is quite large for its class, 11.6″ X 7.6″ X 6.5″ and it has a lot of features to love. The Flex Build Plate is removable. Prints stick well to the new Grip Surface without the need for painter’s tape or glue stick. Prints pop off the build plate when it’s bended and it returns back to shape, sliding back onto the the bed platform with ease. In fact, I found that a lot of prints can be removed by hand without even needing to remove the build plate at all. Auto-leveling is a great feature. I didn’t understand why there was a small hole in the build plate on the right side, until the nozzle squirted out some filament through it at the start of a print. The hot end then probes a few points on the bed. There is no manual leveling required. I ran into a hiccup when after several prints the nozzle failed to find the hole in the bed and auto-leveling didn’t work correctly. The hot end scraped the bed at the beginning of the print before I was able to stop it. Fortunately, the scrape is apparently outside the printable area and the problem was taken care of by running a level build plate calibration, under the settings menu. Auto-leveling worked fine after that.
-

- A little filament is squirted through a hole in the build surface at the start of every print
-

- The build surface is easily removable, flexible and has contact points for auto-leveling
All in all, the Replicator+ is very easy to use and it takes a lot of guess work out of 3D printing. Set up is easy, it’s pretty reliable, WiFi functionality is a very welcome addition. A lot of processes have been simplified or made automatic, which will be a boon to novice users. It would be a good fit for home use and in schools.
Experienced users will likely chafe at the closed system design of both the hardware and software. Print quality needs to see a significant improvement before the Replicator+ can truly be called a 3D printer for professionals. The Replicator+ is also limited to printing in PLA. in addition to their standard PLA, MakerBot also offers their Tough PLA, which is supposed to have the strength of ABS, without the brittleness and is non-toxic. However, you’ll need a Tough PLA Smart Extruder+ to print with it and it is only available as a bundle consisting of three spools of Tough PLA Filament and the Tough PLA Smart Extruder+ (which I didn’t test) for $379. On a professional machine it would be nice to be able to print in more advanced materials.
I am hopeful that this is can be rectified through future software and firmware updates, and is not a hardware issue. It seems that quality control during manufacturing may need some improvement as well. Hopefully, MakerBot can work out the kinks, because the Replicator+ has a lot of features to appreciate and shows potential. The Replicator+ is available through MakerBot for $2,499. Discuss in the MakerBot forum at 3DPB.com.
[All photos: taken by Michael A. Parker for 3DPrint.com]
Subscribe to Our Email Newsletter
Stay up-to-date on all the latest news from the 3D printing industry and receive information and offers from third party vendors.
You May Also Like
High Stakes, High Speed: KVG Acquires 15 Nexa3D HSE 3D Printers to Boost Military Tech
As 3D printing increasingly intersects with defense and military logistics, a new partnership between Nexa3D and mission support logistics firm KVG stresses the growing importance of this technology in strategic...
3D Printing Webinar and Event Roundup: April 28, 2024
In this week’s 3D Printing Webinar and Event Roundup, the Ceramics Expo is taking place in Michigan, Stratasys continues its advanced training courses, and SPE is holding a Polymer Characterization...
Attending the ASTM F42/ISO TC 261 Meetings: The Nitty-Gritty of Additive Manufacturing
I never thought I’d be so excited about an event focused on additive manufacturing (AM) standards, but here we are! When I learned that the recent biannual ASTM F42/ISO TC...
World’s Largest Polymer 3D Printer Unveiled by UMaine: Houses, Tools, Boats to Come
The University of Maine has once again broken its own record by unveiling the largest polymer 3D printer in the world. Surpassing its 2019 achievement, the new Factory of the...